How to Draw a Dog Face: In 8 Easy Steps (With Pictures Guide)

Canine Bible is reader-supported. We receive affiliate commissions via some of our links. Learn more.
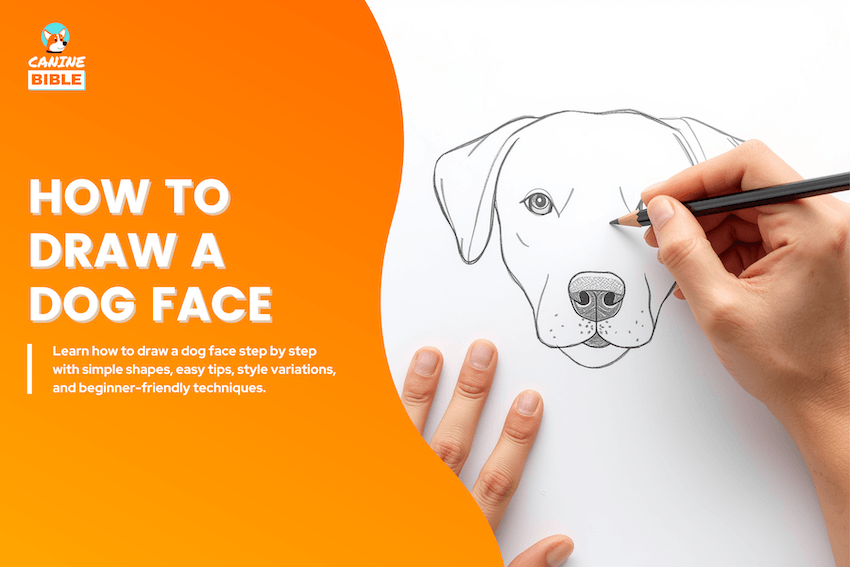
Drawing a dog face starts with a simple outline of the head, then adding the eyes, nose, mouth, and ears in the right proportions. The key is to build the face in basic shapes first, then refine the features and expression step by step. That sounds simple, but dog faces can vary a lot depending on the breed, angle, and fur type. A round pug face, a long collie muzzle, and a fluffy husky face all need slightly different approaches. Many beginners also struggle with symmetry, placing the eyes too high, or making the nose and mouth look off-balance. Once you understand the basic structure, drawing a dog face becomes much easier and more natural. In this guide, you’ll learn how to sketch it correctly, avoid common mistakes, and adapt the process to different dog looks
Materials and Tools You Need to Draw a Dog Face
| Material/Tool | Why You Need It |
|---|---|
| Pencil | A pencil lets you sketch the basic head shape and facial features lightly before refining the drawing. |
| Eraser | An eraser helps fix proportions, clean up guidelines, and adjust mistakes as you draw. |
| Drawing paper | A clean sheet of paper gives you enough space to build the dog face step by step. |
| Reference photo | A photo helps you place the eyes, nose, ears, and muzzle more accurately. |
| Black pen or fineliner | This is useful for outlining the final sketch and making the facial features stand out clearly. |
| Colored pencils | Colored pencils help add fur tones, depth, and a more realistic or playful finish. |
| Blending tool | A blending stump or tissue can soften shading and make the fur look smoother. |
| Ruler | A ruler can help keep the face balanced when checking symmetry and feature placement. |
How to Draw a Dog Face
Drawing a dog face means breaking the subject into simple shapes first, then refining the eyes, nose, muzzle, ears, and fur. The goal is to create a face that looks balanced, expressive, and recognizable, even if you are starting with a very basic sketch.
A good dog face drawing is less about tiny details at the start and more about getting the structure right early. Once the proportions are in place, it becomes much easier to add personality, breed traits, and cleaner finishing lines.
Step-by-Step Guide on How to Draw a Dog Face
Follow these steps to successfully draw a dog face.


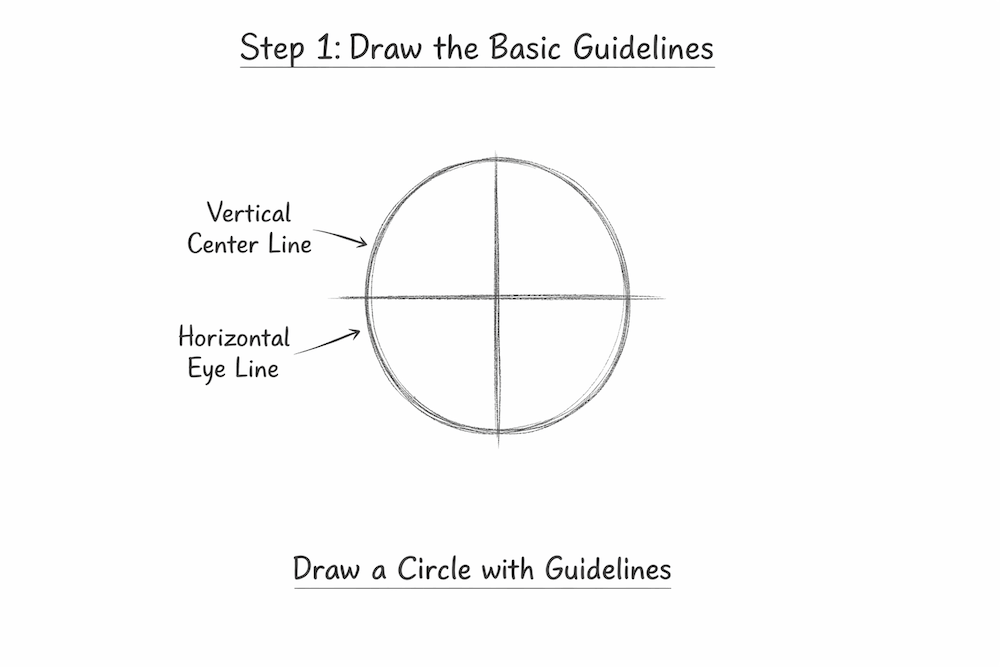
Step 1: Sketch the Basic Head Shape
Start with a loose circle or oval for the skull. Then, lightly add a vertical center line and a horizontal eye line so you can place the features evenly.
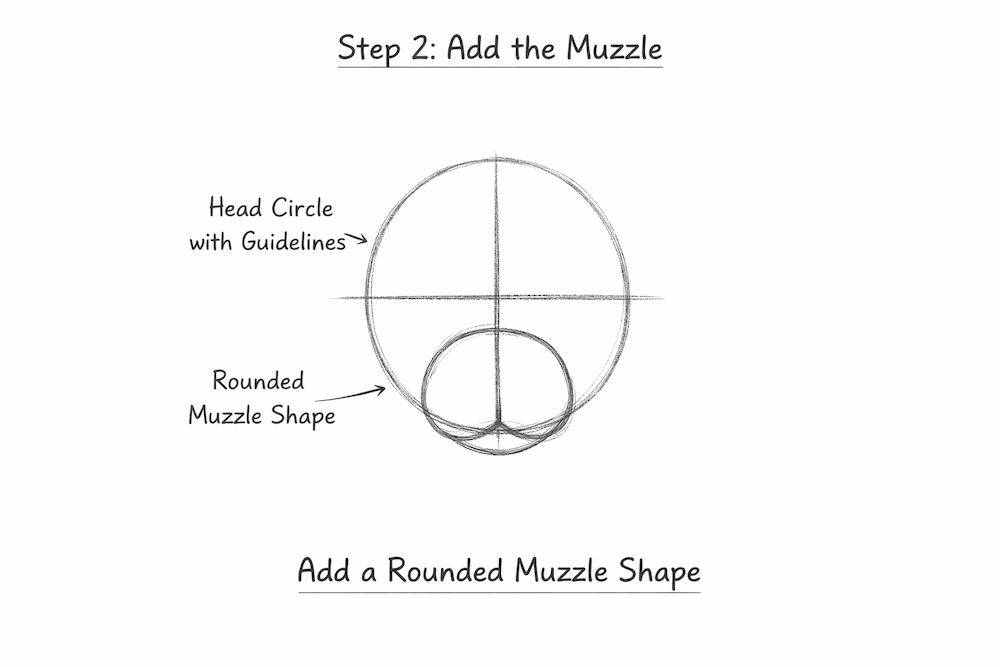
Step 2: Add the Muzzle Shape
Draw a smaller, rounded shape or box-like form extending from the lower center of the face. This creates the muzzle area where the nose and mouth will sit.
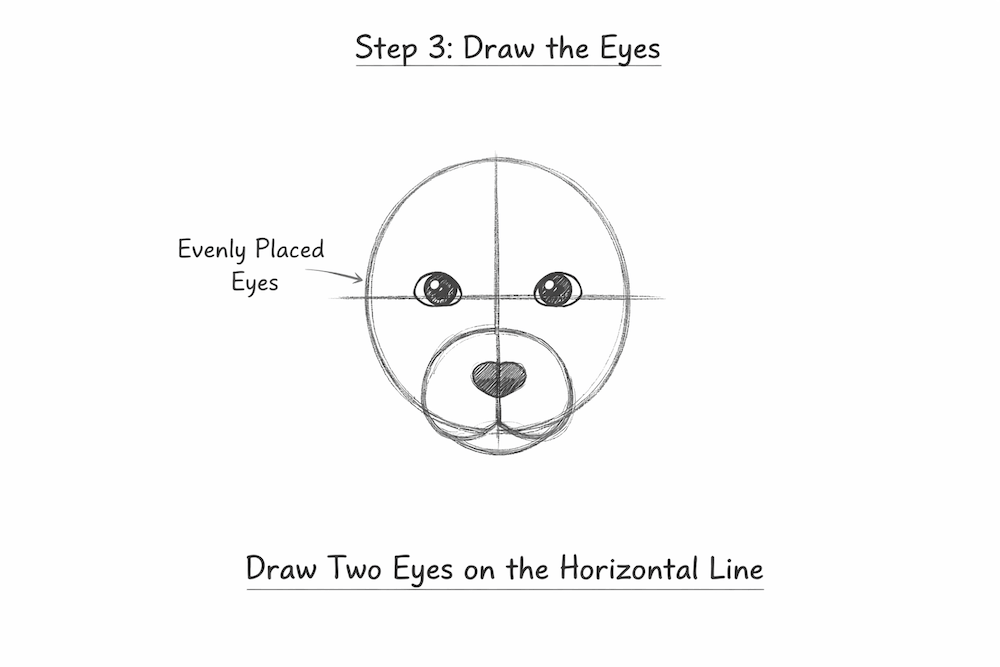
Step 3: Place the Eyes Evenly
Sketch two eye shapes along the horizontal guide, keeping them equal in size and spaced evenly from the center line. The eyes should usually sit a little wider apart than beginners expect.


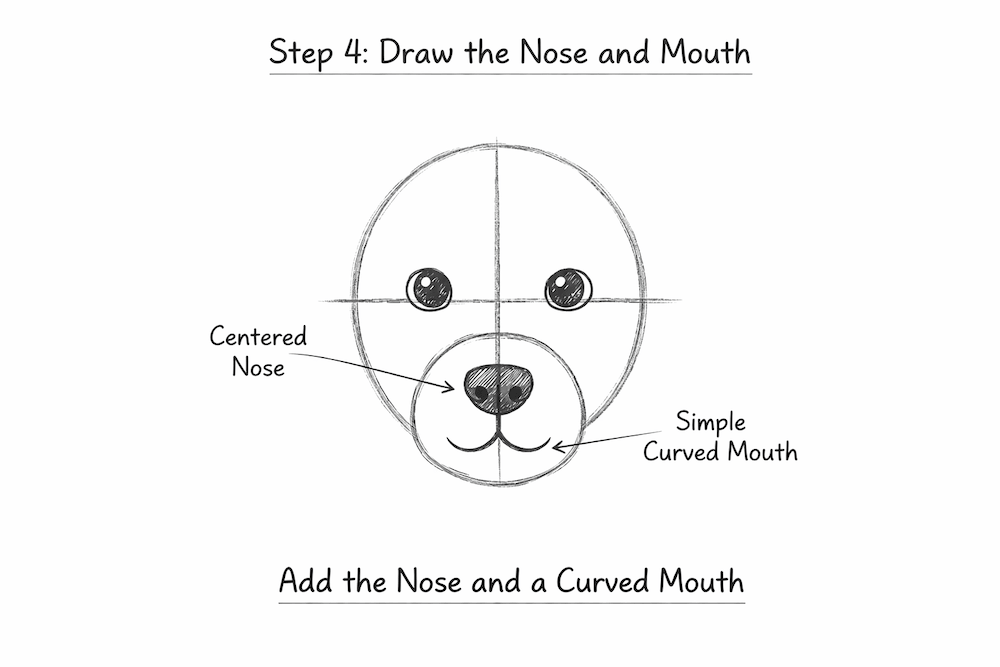
Step 4: Draw the Nose and Mouth
Place the nose at the front of the muzzle, centered on the vertical line. Then add a short line down from the nose and curve the mouth gently to each side.
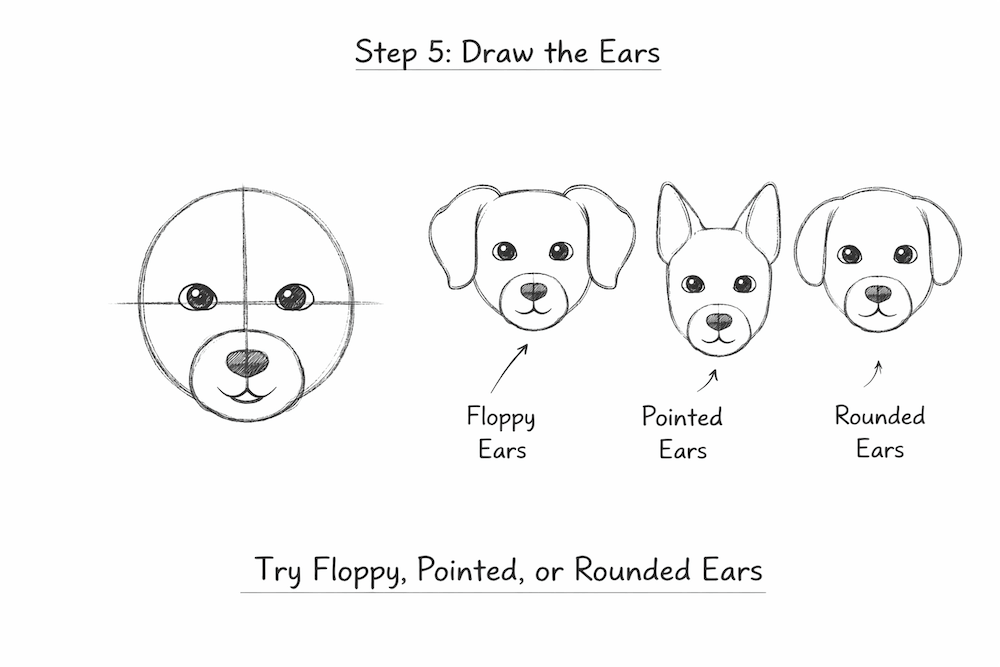
Step 5: Add the Ears
Draw the ears based on the type of dog face you want. Floppy ears, pointed ears, or rounded ears can all change the look of the drawing quickly.
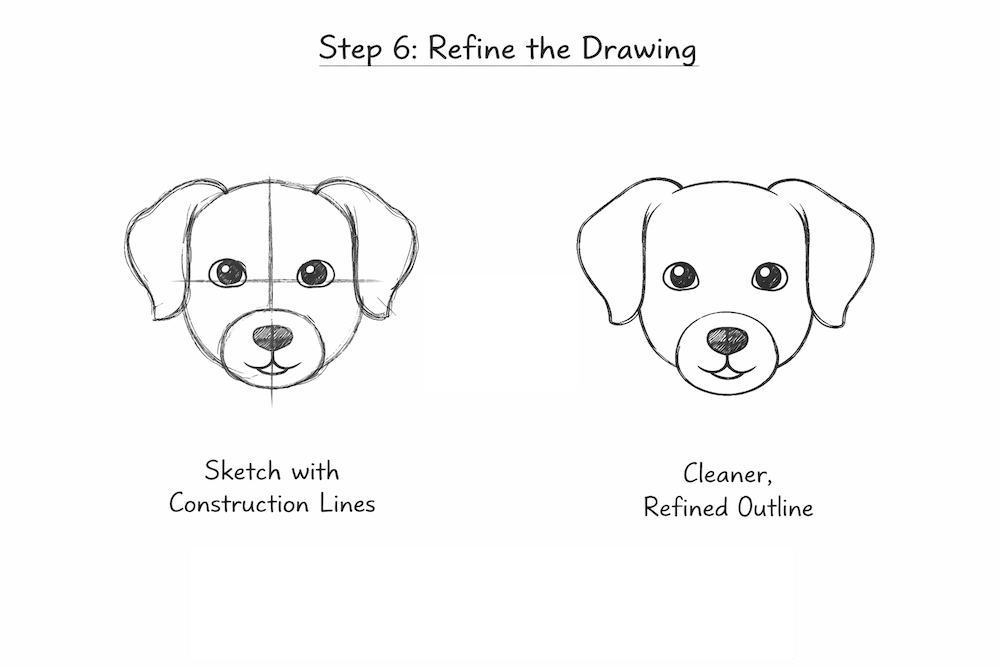
Step 6: Refine the Face Shape
Clean up the outline of the cheeks, forehead, jawline, and muzzle. Adjust anything that looks uneven before committing to darker lines.
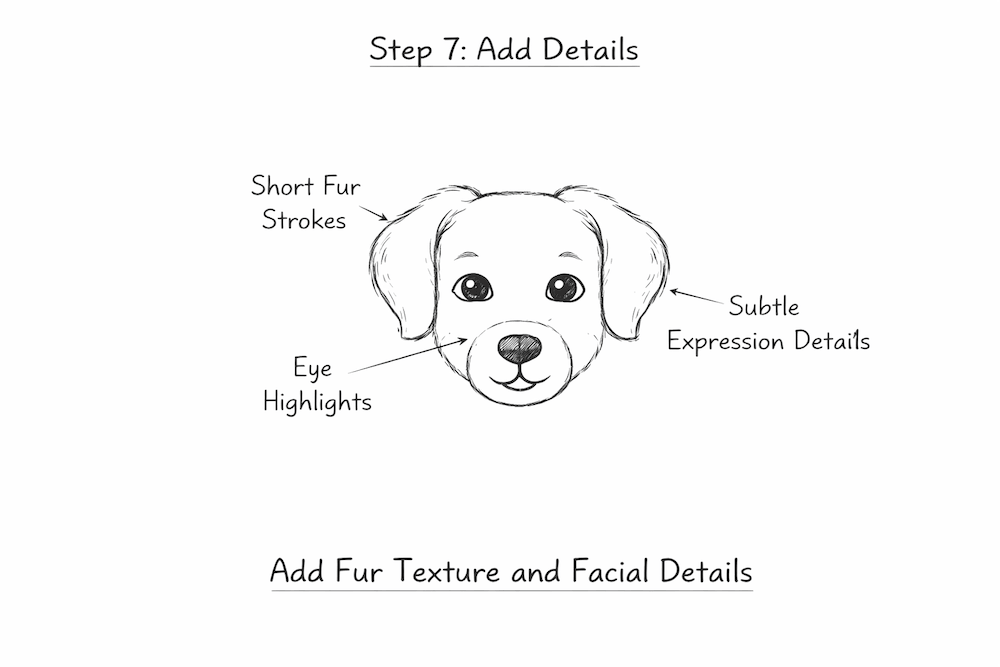
Step 7: Add Fur, Expression, and Small Details
Use short strokes to suggest fur around the cheeks, forehead, and ears. Add pupils, highlights, and small line changes around the mouth and brows to give the dog expression.
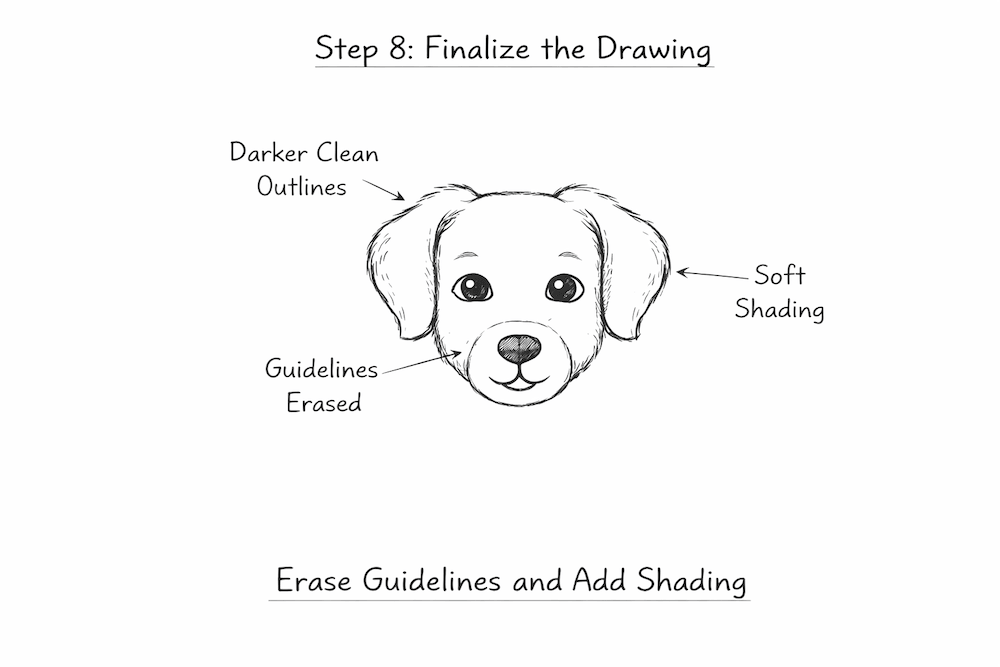
Step 8: Darken the Final Lines and Finish
Trace the best lines more confidently and erase extra guidelines. Add light shading around the eyes, muzzle, and ears if you want more depth.
How to Draw Different Dog Face Styles
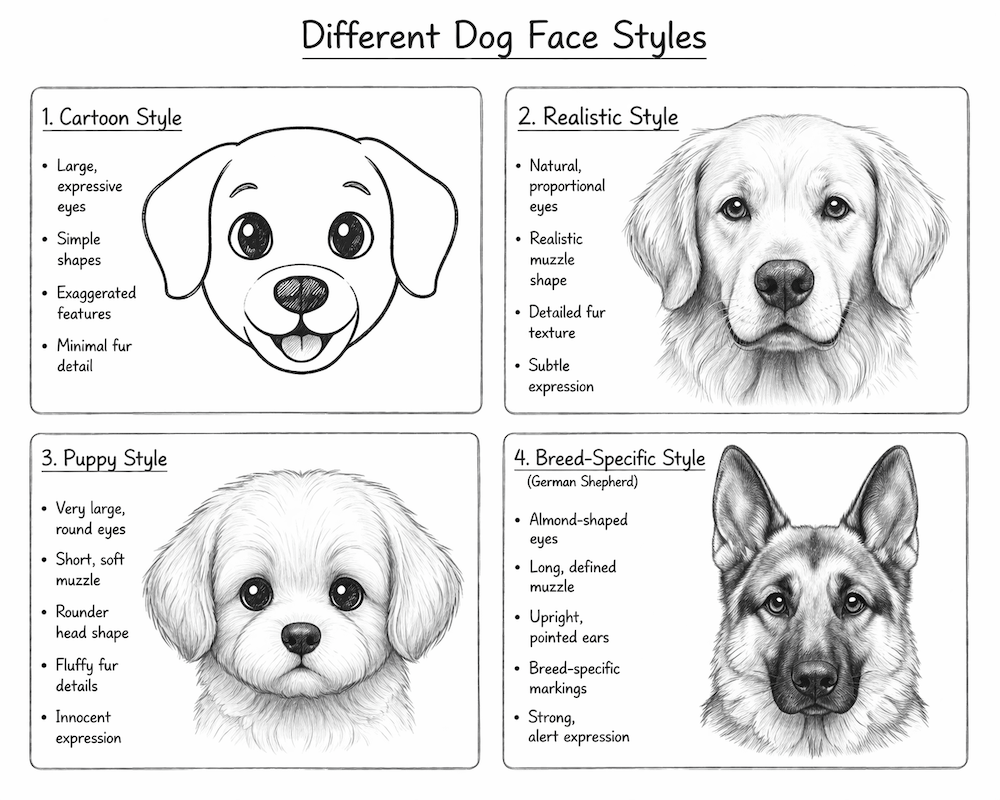
The same basic dog face structure can be adjusted in a few simple ways to create very different looks. Once you understand the placement of the eyes, nose, muzzle, and ears, you can change proportions and details to make the face feel cartoonish, realistic, younger, or tied to a specific breed.
A good approach is to keep the base structure the same and then change only the features that define the style. That makes it much easier to experiment without getting lost in the drawing.
Additional Tips for How to Draw a Dog Face
These tips help you build a dog face more accurately by improving structure, balance, and small details that make the drawing look more natural.
| Tip | Why It Helps | How to Apply It |
|---|---|---|
| Start With Shapes | Simple shapes make the face easier to build correctly. | Use circles and ovals before drawing any details. |
| Use Light Lines | Light sketching makes mistakes easier to correct early. | Press gently until the proportions look balanced. |
| Check Symmetry Often | Balanced features make the dog face look more natural. | Compare both sides before darkening final lines. |
| Study Real Dogs | Reference photos improve accuracy and facial character. | Keep one clear front-view photo beside your paper. |
| Focus on Expression | Small feature changes strongly affect the dog’s look. | Adjust eyes, brows, and mouth with subtle changes. |
| Build Fur Last | Fur looks better after the main structure is correct. | Finish the outline first, then add texture strokes. |
Common Mistakes When Learning How to Draw a Dog Face
This highlights the most common drawing errors that can throw off a dog face and explains why fixing them improves the final result.
| Mistake | Why It’s a Problem |
|---|---|
| Skipping Guidelines | The features often end up crooked or uneven. |
| Eyes Too High | The face can look awkward and unbalanced. |
| Nose Too Large | An oversized nose throws off the whole face. |
| Ears Don’t Match | Uneven ears make the drawing feel unfinished. |
| Too Much Fur Early | Extra texture hides mistakes in the base structure. |
| Dark Lines Too Soon | Early heavy lines make corrections much harder. |
Review and Improve Your Dog Face Drawing
After finishing your drawing, step back and review the overall balance before calling it done. Check whether the eyes line up, the muzzle sits centrally, and the ears feel even in size and placement.
To maintain good results, keep practicing the same basic structure with different dog breeds and expressions. That repetition helps train your eye and makes future drawings faster and more accurate.
Signs of success include a face that looks balanced, readable, and expressive even without heavy detail. If the drawing still feels off, compare it against a reference photo and correct the big shapes first rather than reworking tiny details.
If you keep struggling with proportion, symmetry, or facial expression, it may help to use tracing exercises, grid methods, or beginner portrait references before moving into more advanced dog faces.
Frequently Asked Questions
The Bottom Line
Drawing a dog face becomes much easier once you break it into simple shapes and build the features step by step. Whether you want a basic sketch, a cute cartoon look, or a more realistic dog portrait, the key is starting with structure before adding details. As you practice, you will get better at placing the eyes, shaping the muzzle, and adjusting the ears and fur to match different styles. Keep your lines light, use reference photos when needed, and do not worry if the first version is not perfect. With a little patience and repetition, you can create a dog face that looks balanced, expressive, and full of character.