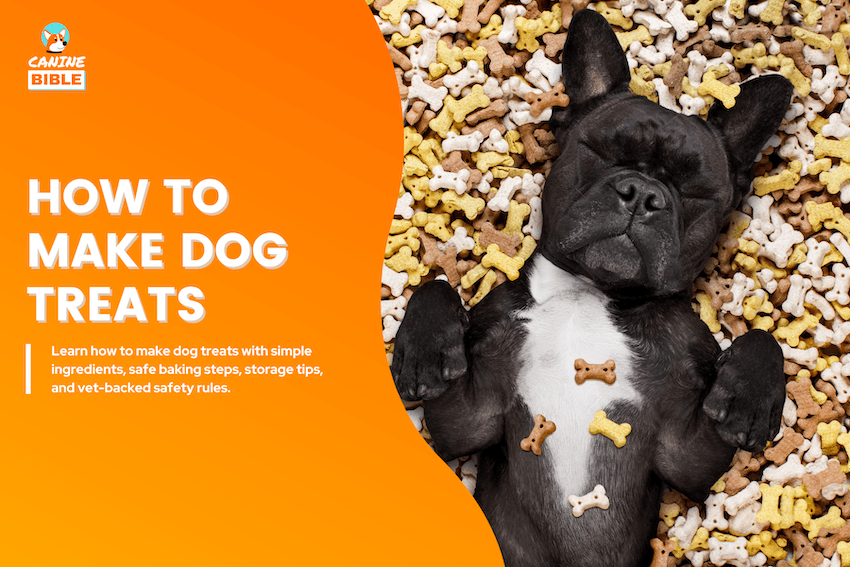
How to Make Dog Treats at Home (& 20+ Simple & Easy Recipes)

Canine Bible is reader-supported. We receive affiliate commissions via some of our links. Learn more.
You can make dog treats at home by combining dog-safe ingredients, shaping them into bite-sized pieces, and baking, freezing, or dehydrating them until ready to serve. The best homemade dog treats are simple, portion-controlled, and made without toxic foods like chocolate, grapes, onions, garlic, or xylitol. But not every homemade treat is automatically healthy. The right recipe depends on your dog’s size, age, allergies, chewing habits, and calorie needs. Some treats are better for training, while others work best for dental support, sensitive stomachs, or special occasions. Before you grab the peanut butter or pumpkin, it’s important to know which ingredients are safe, how much to feed, and when homemade treats may not be the best choice.
What You Need to Make Dog Treats
| Supply | Why You Need It |
|---|---|
| Mixing Bowl | Helps combine ingredients evenly without making a mess. |
| Measuring Cups | Keeps ingredient amounts consistent for safer treat portions. |
| Dog-Safe Ingredients | Prevents unsafe foods from ending up in your recipe. |
| Baking Tray | Gives treats a flat surface for even baking. |
| Parchment Paper | Prevents sticking without adding unnecessary oils or sprays. |
| Cookie Cutter | Makes treats easy to shape into consistent sizes. |
| Cooling Rack | Lets treats cool fully before storage or serving. |
| Airtight Container | Helps keep finished treats fresher for longer. |
What to Know Before Making Homemade Dog Treats
Homemade dog treats are snacks, not complete nutrition. Commercial complete-and-balanced dog foods are formulated to provide the required nutrients in proper amounts, while homemade treats usually are not.
The safest approach is to keep recipes short and plain. Use treats to reward behavior, add enrichment, or make training more enjoyable, but do not let them replace your dog’s regular diet.
Before you start, consider:
Remember to always consult with your vet before making any changes that could affect your dog’s health, nutrition, or well-being. If you can’t reach your vet, you can chat live with a registered online veterinary professional via our online vet chat or video chat support (24 hours a day, 7 days a week). Or use Chewy’s online vet services (6 a.m. – midnight ET).
Dog-Safe Ingredients for Homemade Dog Treats
A good homemade dog treat starts with a small number of familiar ingredients. Choose plain, unsweetened, unseasoned foods whenever possible.


| Dog-Safe Ingredient | Why It Works | Best Way to Use It |
|---|---|---|
| Oat Flour | Creates a soft, mild biscuit base. | Use for simple baked treats. |
| Whole Wheat Flour | Gives structure to firm dog biscuits. | Use only if your dog tolerates wheat. |
| Plain Pumpkin | Adds moisture and gentle fiber. | Choose plain puree, not pie filling. |
| Sweet Potato | Adds natural sweetness and soft texture. | Use cooked, plain, mashed sweet potato. |
| Carrot | Adds crunch, color, and mild sweetness. | Grate finely or cook until soft. |
| Banana | Binds dough and adds natural flavor. | Use mashed banana in small amounts. |
| Blueberries | Add small bursts of fruit flavor. | Use a few fresh or frozen berries. |
| Apple | Adds mild sweetness and moisture. | Remove seeds and core before using. |
| Egg | Helps bind dough during baking. | Use cooked or fully baked into treats. |
| Plain Chicken | Adds high-value flavor for training. | Use cooked, boneless, unseasoned chicken. |
| Plain Turkey | Adds lean protein and savory flavor. | Use cooked, skinless, unseasoned turkey. |
| Plain Yogurt | Adds creaminess to frozen treats. | Choose unsweetened yogurt without xylitol. |
| Peanut Butter | Adds strong flavor dogs often enjoy. | Use xylitol-free peanut butter sparingly. |
| Low-Sodium Broth | Adds moisture and savory flavor. | Use onion-free and garlic-free broth only. |
| Parsley | Adds mild herbal flavor and freshness. | Use small amounts of plain parsley. |
Ingredients to Avoid in Homemade Dog Treats
Homemade dog treats can be safe, simple, and useful when they are made with plain, dog-friendly ingredients. The risk comes when owners add human foods, sweeteners, seasonings, or prepared ingredients that may be toxic, irritating, too rich, or difficult for dogs to digest.
Always check labels before using packaged foods like peanut butter, broth, applesauce, yogurt, baby food, or baking mixes. Look closely for sweeteners such as xylitol, added salt, onion powder, garlic powder, spices, chocolate, or other flavorings that are not appropriate for dogs.
Veterinary poison-control and animal health sources commonly warn against xylitol, chocolate, grapes, raisins, onions, garlic, alcohol, caffeine, macadamia nuts, raw yeast dough, and moldy foods. For a more complete safety list, see our guide to toxic foods dogs should avoid.
| Ingredient to Avoid | Why It’s Unsafe | Safer Note |
|---|---|---|
| Xylitol | This sweetener can cause dangerous poisoning in dogs. | Use only xylitol-free peanut butter or products. |
| Chocolate | Chocolate contains compounds dogs cannot process safely. | Use carob only if your vet approves it. |
| Grapes | Grapes can cause serious kidney problems in dogs. | Use small blueberries or apple pieces instead. |
| Raisins | Raisins carry the same risk as grapes. | Choose plain, dog-safe fruit in small amounts. |
| Onions | Onions can damage a dog’s red blood cells. | Use plain recipes without savory seasonings. |
| Garlic | Garlic can irritate digestion and affect blood cells. | Skip garlic powder, garlic salt, and blends. |
| Chives | Chives belong to the same risky plant family. | Keep herb-flavored treats plain instead. |
| Macadamia Nuts | Macadamia nuts can cause weakness and vomiting. | Use dog-safe nut butter without xylitol. |
| Alcohol | Alcohol is unsafe even in small amounts. | Never use beer, wine, liquor, or extracts. |
| Caffeine | Caffeine can overstimulate the heart and nervous system. | Avoid coffee, tea, cocoa, and energy products. |
| Nutmeg | Nutmeg can upset dogs and may be toxic. | Use plain pumpkin without pie spices. |
| Cooked Bones | Cooked bones can splinter or block digestion. | Use boneless cooked meat for flavor. |
| Raw Yeast Dough | Rising dough can expand and produce alcohol. | Bake treats fully before offering them. |
| Moldy Foods | Mold can contain toxins harmful to dogs. | Discard spoiled ingredients or old treats. |
| Salted Foods | Too much salt can upset fluid balance. | Use unsalted, plain ingredients only. |
| Seasoned Foods | Seasoning blends may contain onion or garlic. | Choose single-ingredient, unseasoned foods. |
How to Make Dog Treats Step by Step
Follow these simple steps to make homemade dog treats using dog-safe ingredients, easy preparation methods, and proper storage tips.
Step 1: Choose a Simple Dog-Safe Recipe
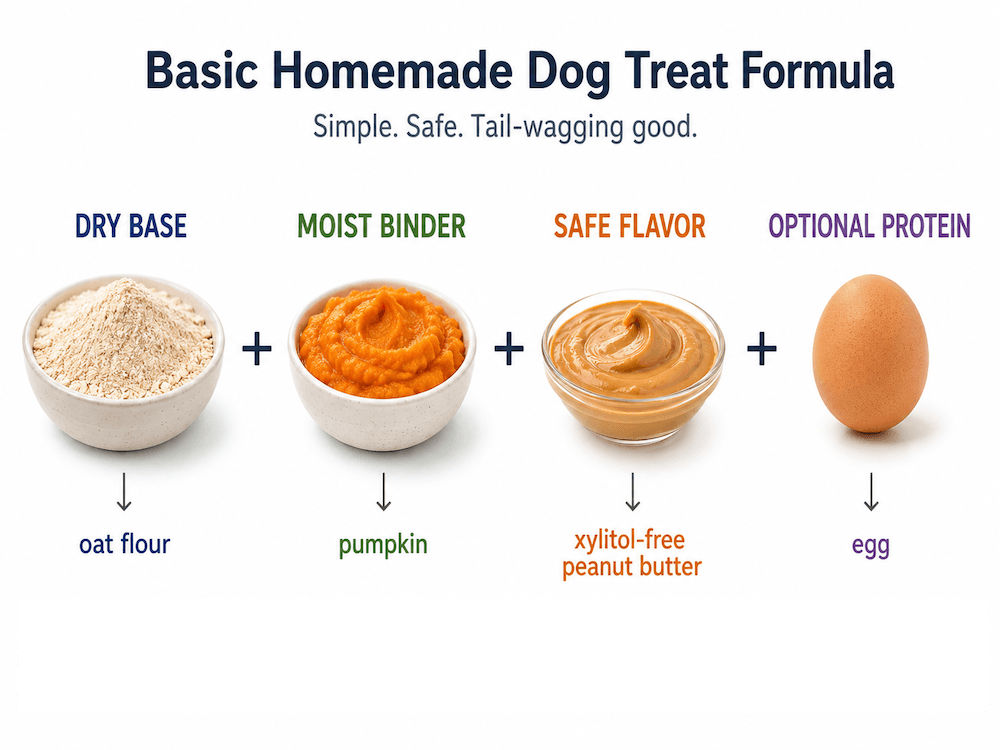
Start with a basic recipe using plain, familiar ingredients. A beginner-friendly option is oat, pumpkin, and peanut butter treats: use 2 cups oat flour, 1/2 cup plain pumpkin puree, 1/4 cup xylitol-free peanut butter, and 1 egg. Use plain canned pumpkin, not pumpkin pie filling, and check peanut butter labels carefully because xylitol is dangerous for dogs.
Step 2: Prepare Your Kitchen and Wash Your Hands
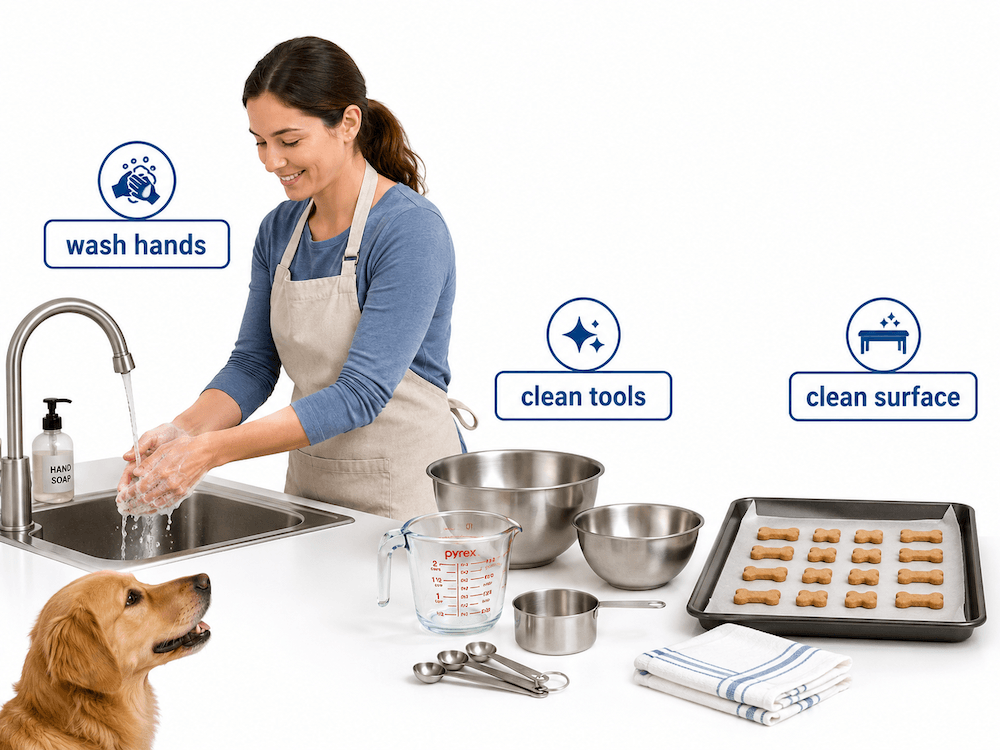
Wash your hands, clean the counter, and use clean utensils before handling ingredients. The AVMA recommends safe handling practices for pet food and treats to reduce contamination risks for pets and people.
Step 3: Mix the Wet Ingredients First
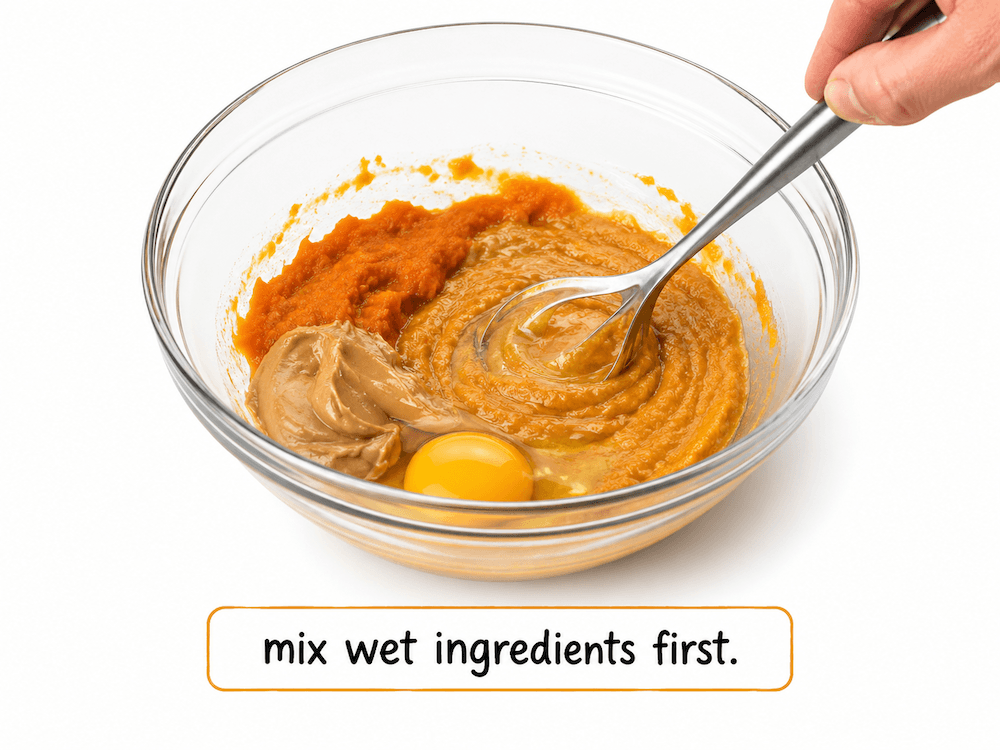
In a large bowl, combine the pumpkin puree, peanut butter, and egg until smooth. Mixing wet ingredients first helps spread flavor evenly before adding the flour.
Step 4: Add the Flour and Form a Dough
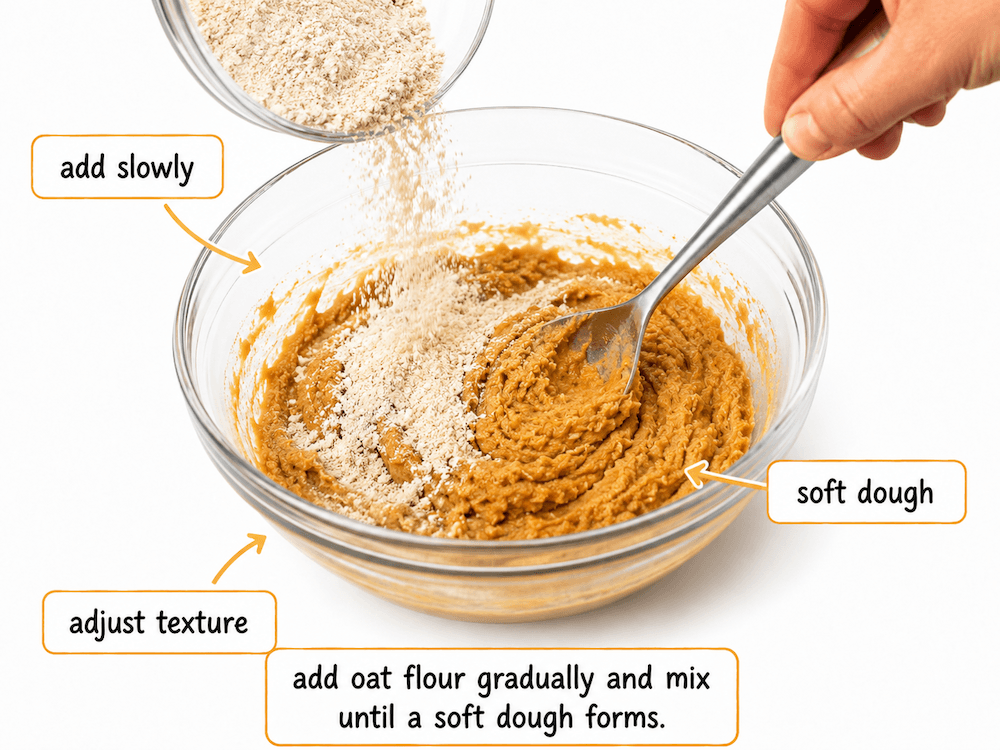
Add oat flour slowly and stir until a soft dough forms. If the dough is sticky, add a small amount of extra oat flour; if it is dry, add a teaspoon of water at a time.
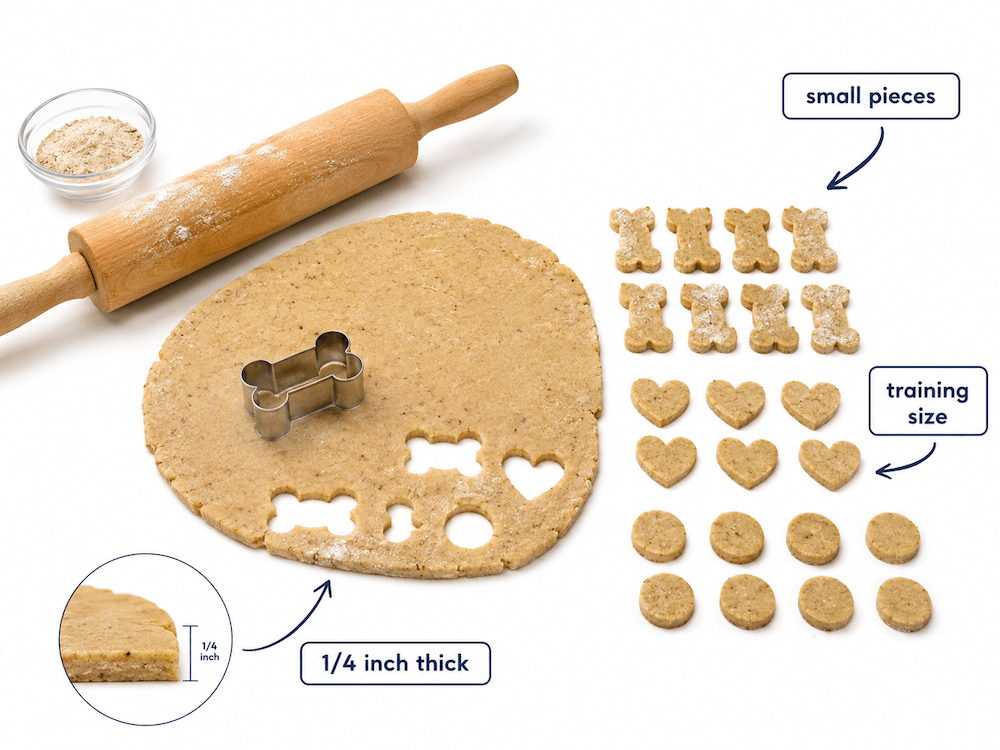
Step 5: Roll and Cut the Treats
Roll the dough to about 1/4 inch thick, then cut it into small shapes. For training treats, make tiny pieces so your dog gets the reward without too many extra calories. Veterinary nutrition guidance commonly recommends keeping treats and extras under 10% of daily calories.
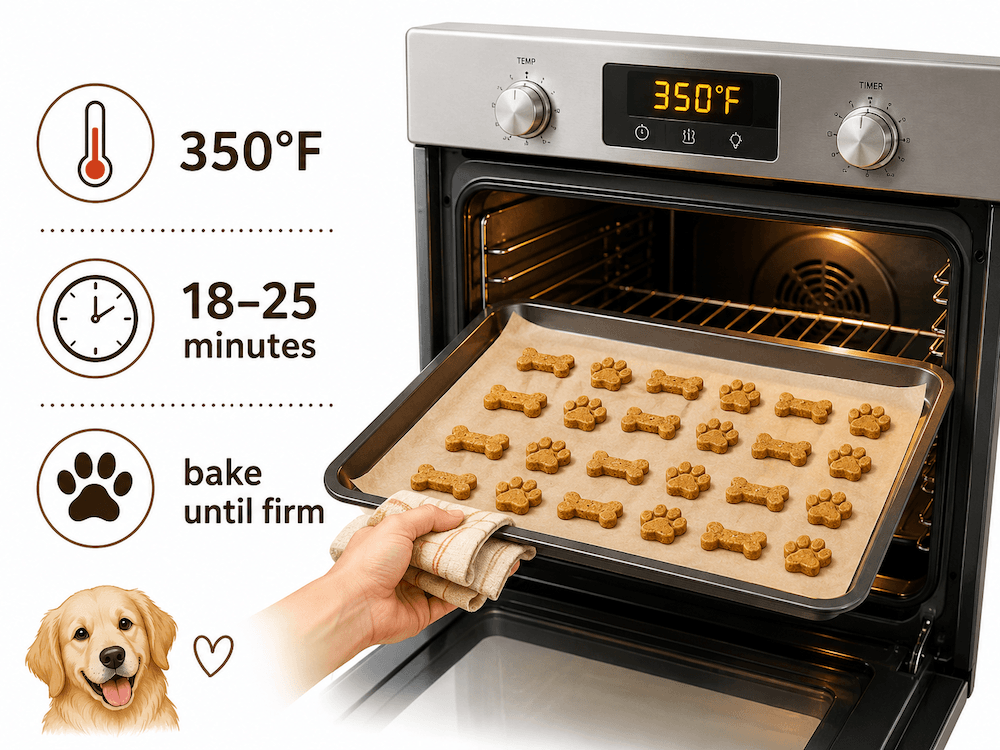
Step 6: Bake Until Firm
Place treats on a parchment-lined baking sheet and bake at 350°F for about 18–25 minutes, depending on size. Smaller treats bake faster, while thicker treats need more time.
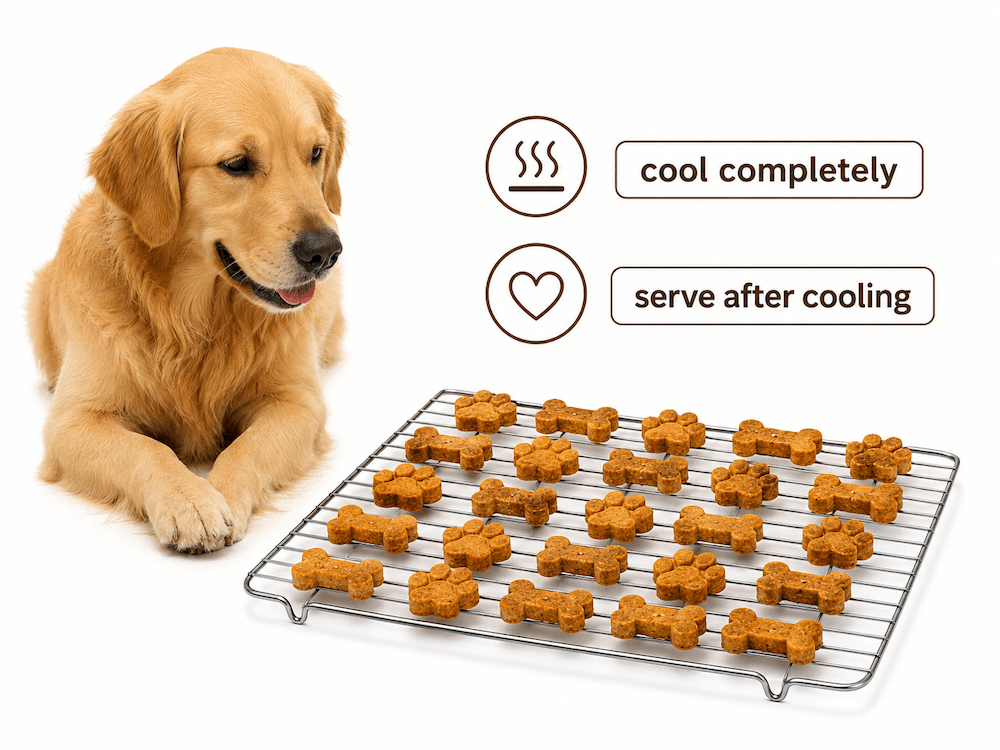
Step 7: Cool Completely Before Serving
Let the treats cool fully on a rack before giving one to your dog. Warm treats may crumble, feel too soft, or be uncomfortable for your dog to eat.
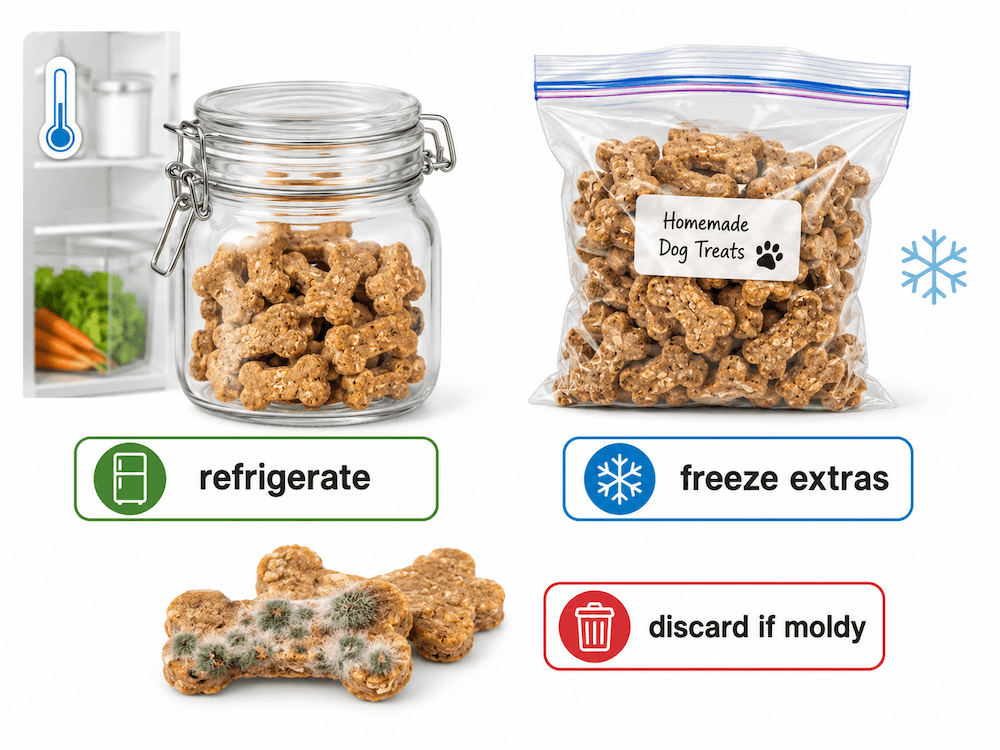
Step 8: Store the Dog Treats Safely
Store cooled treats in an airtight container. Keep them in the refrigerator for short-term use, or freeze extras for longer storage. Because homemade treats lack commercial preservatives, discard them if they smell sour, look moldy, or feel unusually wet.
20+ Homemade Treat Recipes You Can Try
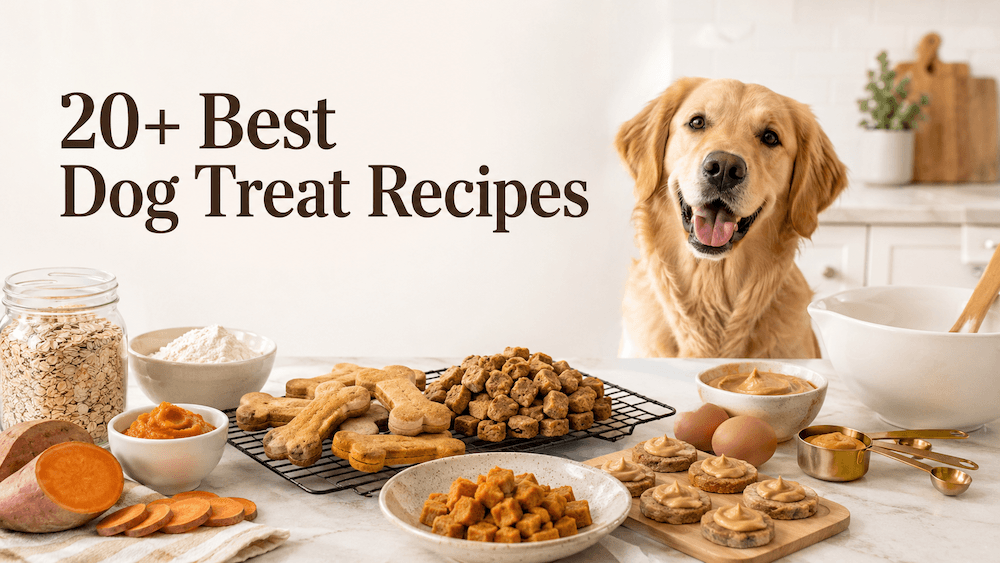
Try these vet-approved homemade dog treat recipes if you want simple, dog-friendly ideas to make at home.
How to Adjust Homemade Dog Treats for Different Uses
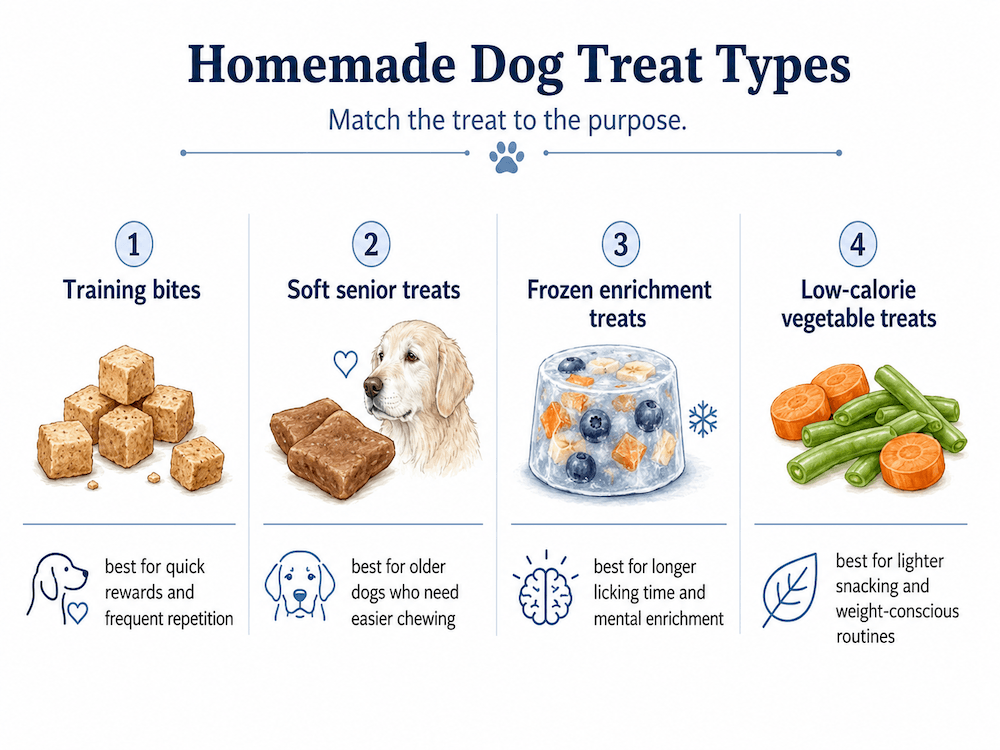
The best recipe depends on why you are making treats. Training treats should be tiny and easy to swallow, while enrichment treats can be larger or frozen for slower licking.
How Many Homemade Dog Treats Can a Dog Have?
The safest answer is: only enough to stay within your dog’s daily treat allowance. A common veterinary nutrition guideline is that treats should not exceed 10% of daily calories, with the remaining 90% or more coming from complete and balanced food.
A small dog reaches that limit much faster than a large dog. For example, one chunky homemade biscuit may be too much for a toy breed but reasonable for a large active dog.
Follow these practical portion rules:
Safe Storage for Homemade Dog Treats
Homemade treats should be stored more carefully than shelf-stable commercial treats. Moisture, heat, and time can increase spoilage risk.
| Treat Type | Storage Guidance |
|---|---|
| Crunchy Baked Biscuits | Store in an airtight container once fully dry. |
| Soft Baked Treats | Refrigerate and use within a few days. |
| Meaty Treats | Refrigerate promptly and use quickly. |
| Frozen Treats | Keep frozen until serving. |
| Any Moldy Treat | Throw it away immediately. |
What Is Normal After a Dog Eats Homemade Treats?
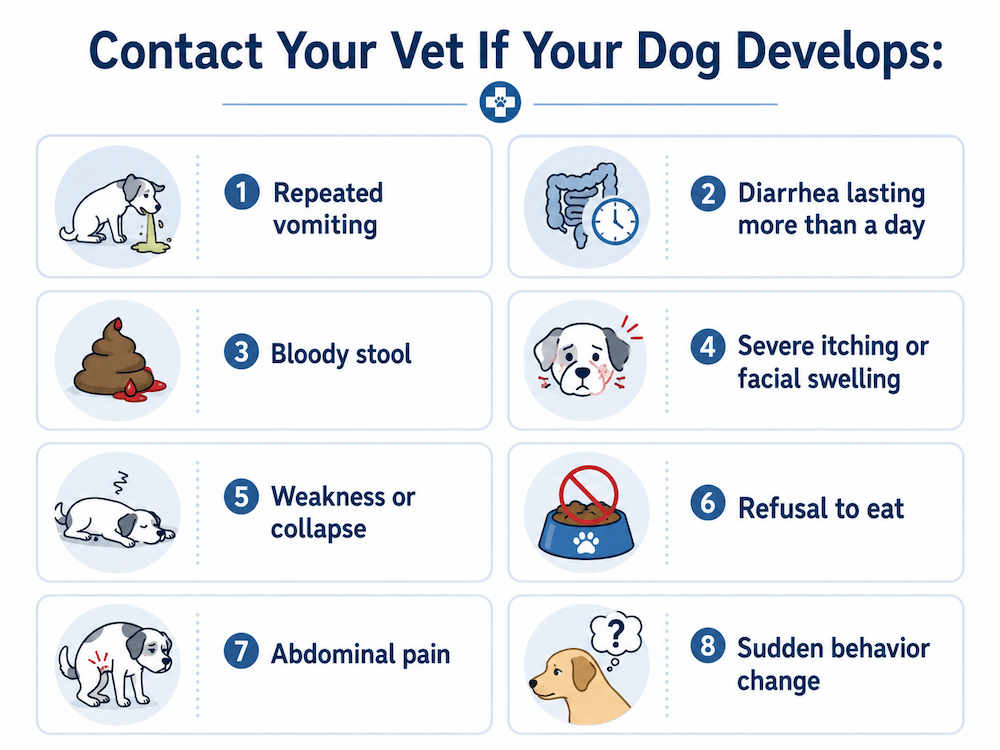
A dog should be able to eat a small homemade treat without vomiting, diarrhea, itching, or sudden behavior changes. Mild curiosity, excitement, or begging is normal; digestive upset is not something to ignore if it continues.
Introduce one new treat at a time. That makes it easier to identify which ingredient caused a problem.
| Reaction | What It May Mean | Owner Action |
|---|---|---|
| Normal Interest | Your dog likes the flavor and smell. | Use tiny pieces during training. |
| Soft Stool | The new ingredient may be too rich. | Stop treats and monitor closely. |
| Vomiting | The treat may not agree with them. | Call your vet if it continues. |
| Itchy Skin | A food sensitivity may be possible. | Stop the ingredient and ask your vet. |
| Weakness | Toxin exposure may be possible. | Seek urgent veterinary help. |
Mistakes That Make Homemade Dog Treats Less Safe
Some treat-making mistakes are easy to miss. The biggest problems usually involve unsafe ingredients, oversized portions, poor storage, or assuming that homemade automatically means healthy.
| Mistake | Why It’s a Problem | How to Avoid It |
|---|---|---|
| Skipping Labels | Hidden xylitol can poison dogs quickly. | Check every packaged ingredient first. |
| Using Seasoning | Garlic, onion, and salt can cause issues. | Keep every recipe plain and simple. |
| Oversized Treats | Large treats add calories very quickly. | Cut small rewards before baking. |
| Poor Storage | Moist treats can spoil faster at home. | Refrigerate soft treats after cooling. |
| Too Many Extras | Treats can unbalance daily nutrition. | Stay near the 10% treat rule. |
| Raw Treats | Raw animal ingredients can carry germs. | Use cooked or baked treats instead. |
Helpful Tips for Making Dog Treats at Home
Small improvements make homemade dog treats safer and easier to use. Focus on consistency, portion control, and simple recipes.
| Tip | Why It Helps | How to Apply It |
|---|---|---|
| Start Simple | Few ingredients make reactions easier to track. | Use three to four ingredients first. |
| Make Minis | Tiny treats work better for training. | Cut pieces before baking them. |
| Label Batches | Dates help prevent accidental spoilage. | Write the recipe and date. |
| Freeze Extras | Freezing helps preserve larger batches. | Freeze flat before bagging portions. |
| Use Kibble | Kibble avoids adding extra calories. | Reserve meal kibble as rewards. |
| Watch Weight | Frequent treats can cause weight gain. | Adjust meals on heavy training days. |
When to Call a Veterinarian About Homemade Dog Treats
Call your veterinarian before making treats if your dog has a medical condition affected by diet. This includes pancreatitis, kidney disease, diabetes, obesity, inflammatory bowel disease, food allergies, heart disease, or a prescription diet.
Call urgently if your dog may have eaten xylitol, chocolate, grapes, raisins, onions, garlic, alcohol, caffeine, macadamia nuts, raw yeast dough, moldy food, or a large amount of fatty food. The FDA warns that xylitol poisoning can cause vomiting, weakness, collapse, seizures, liver failure, and other severe signs.
What Veterinary Research Says About Homemade Dog Treats
Veterinary nutrition sources consistently support one major idea: treats should be kept small and should not replace a complete diet. Tufts notes that treats should stay around 10% of daily calories, while Merck Veterinary Manual explains that complete-and-balanced foods are designed to provide essential nutrients in appropriate amounts.
Research on home-prepared diets also shows why homemade snacks should not turn into homemade meals without professional formulation. One analysis of home-prepared dog and cat diet recipes concluded that these recipes may expose animals to nutritional deficiencies, especially when used as major parts of the diet.[1]
Food safety research matters, too. A PLOS ONE study on dog owner feeding practices found that better adherence to pet food handling and dish hygiene guidance could help reduce bacterial contamination risk in domestic settings.[2]
For raw treats, the CDC is clear: raw pet food and treats can make pets and people sick, which is why raw treats are not the safest choice for home preparation.
What to Monitor After Making Dog Treats
After making homemade dog treats, offer one small piece first instead of giving a full serving right away. Watch your dog for the next 24 hours, especially if the recipe includes a new ingredient.
A good sign is that your dog enjoys the treat, keeps normal energy, has normal stool, and continues eating regular meals. Mild curiosity or excitement is normal, but vomiting, diarrhea, itching, swelling, or unusual behavior means the recipe may not be a good fit.
To keep treats safe, make each piece small, store the batch properly, introduce only one new recipe at a time, and count treats toward your dog’s daily calories. Stop using any recipe that causes stomach upset, and keep simple ingredient notes if your dog has allergies, sensitivities, or a history of digestive issues.
Frequently Asked Questions
The Bottom Line
To make dog treats safely, choose plain dog-safe ingredients, mix a simple dough, cut small portions, bake until firm, cool completely, and store them properly. Homemade treats work best as small rewards, not as a replacement for complete and balanced dog food. Keep treats within about 10% of your dog’s daily calories, avoid toxic ingredients, and introduce new recipes slowly. For dogs with medical conditions, food allergies, weight concerns, or prescription diets, ask your veterinarian before making homemade treats a regular habit.