How to Draw a Dog 101: Easy Step-by-Step Guide (For Beginners)

Canine Bible is reader-supported. We receive affiliate commissions via some of our links. Learn more.
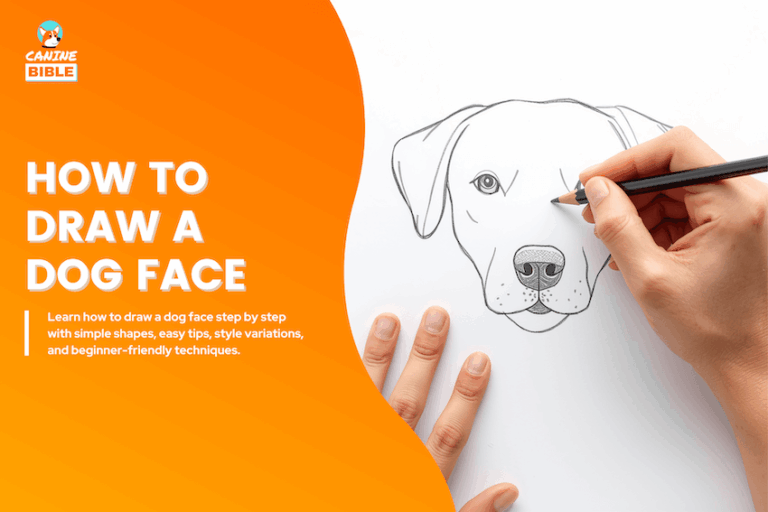
Drawing a dog starts with simple shapes—circles, ovals, and lines—to build the body, head, and proportions. From there, you refine the outline, add features like ears, eyes, and fur details, and adjust the pose to bring the dog to life. But what if the dog is sitting, running, or facing sideways? Proportions and structure can change more than you’d expect. Many beginners struggle with getting the face right or making the body look natural rather than stiff. There are also different approaches depending on whether you want a realistic sketch or a simple cartoon style. In this guide, you’ll learn step-by-step methods, common mistakes to avoid, and how to adapt your drawing to any dog breed or pose.
Materials and Tools You Need to Draw a Dog
Before you start, gather the following items.
| Material / Tool | Why You Need It | How to Use It |
|---|---|---|
| Pencil (HB or 2B) | Creates clean lines and easy-to-adjust sketches. | Use light strokes for guidelines and darker for outlines. |
| Eraser | Removes mistakes and construction lines cleanly. | Erase lightly to avoid damaging the paper surface. |
| Drawing paper | Provides a smooth surface for sketching details. | Choose medium-weight paper for better control. |
| Reference photo | Helps guide proportions and realistic features. | Keep it visible while sketching the dog. |
| Sharpener | Keeps pencil tips precise for fine details. | Sharpen regularly to maintain consistent line quality. |
| Blending tool | Softens shading and adds depth to drawings. | Use gently to blend shadows and fur textures. |
| Ruler (optional) | Helps maintain symmetry and alignment early on. | Use lightly for guidelines if needed. |
| Colored pencils | Adds color and realism to finished drawings. | Layer colors gradually for natural-looking fur. |
How to Draw a Dog
Drawing a dog means building the animal in layers, starting with simple shapes and ending with features, fur, and expression. The goal is to create a dog that looks balanced, natural, and recognizable, whether you want a realistic sketch or a simpler cartoon-style drawing.


Step-by-Step Guide: How to Draw a Dog
Follow these eight simple steps to draw a realistic dog.
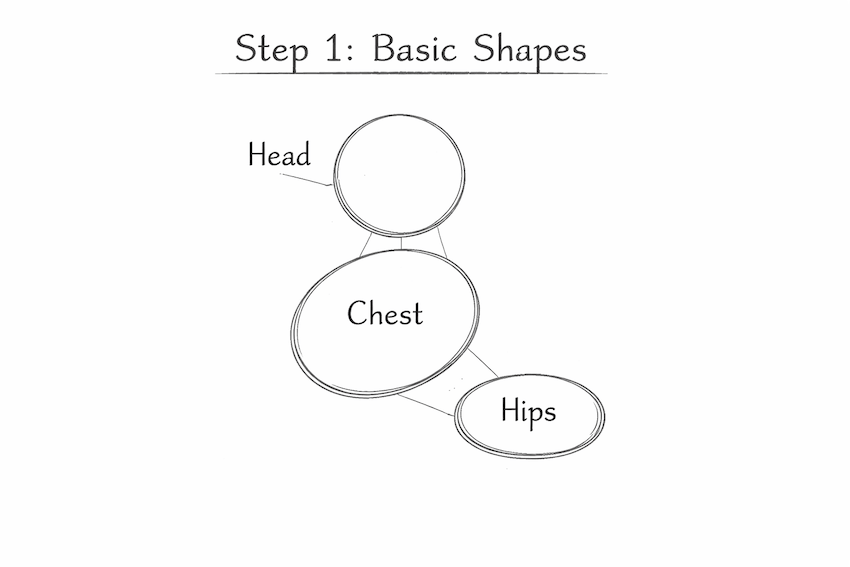
Step 1: Sketch the Basic Body Shapes
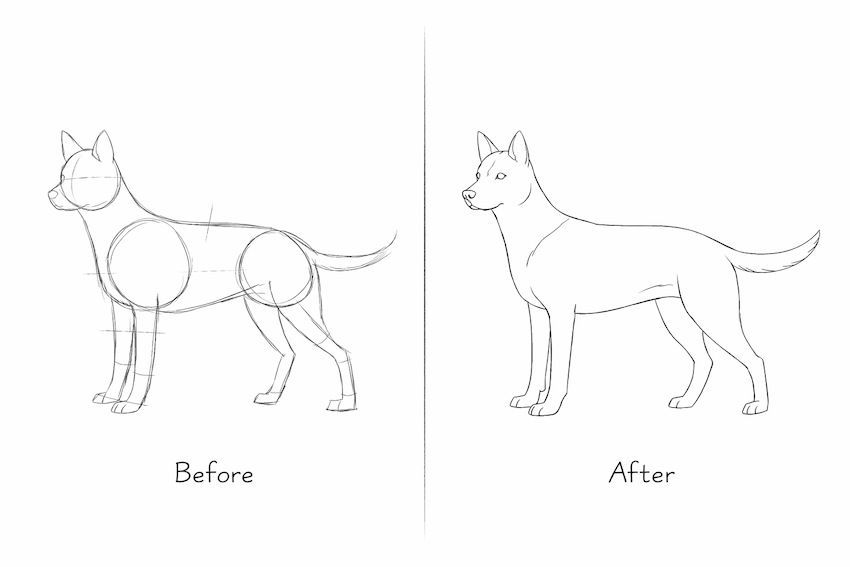
Start by drawing a medium oval for the ribcage and a slightly smaller oval behind it for the hips. Add a circle for the head, then connect the shapes with light guidelines for the neck and back.
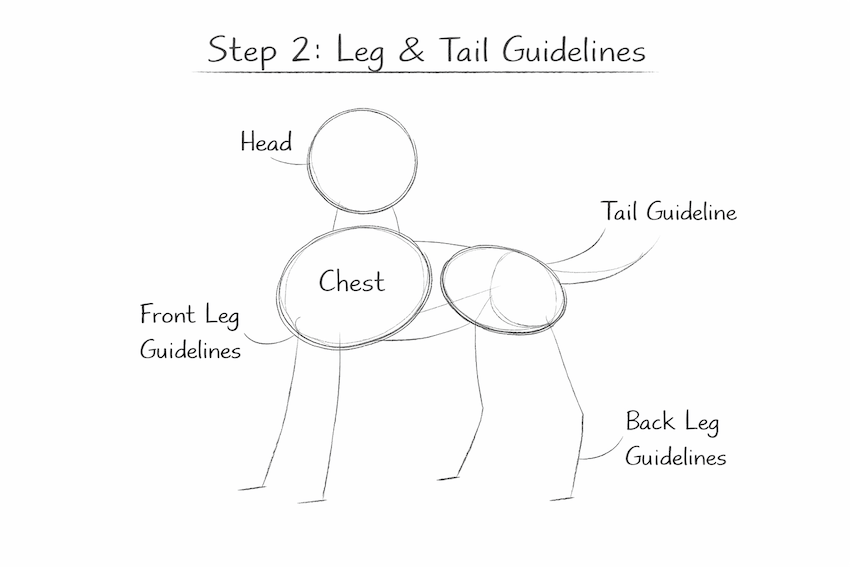
Step 2: Add the Leg and Tail Guidelines
Draw straight or slightly bent lines to mark where the front and back legs will go. Then add a simple tail line to show the direction and movement of the tail.


Step 3: Outline the Head and Muzzle
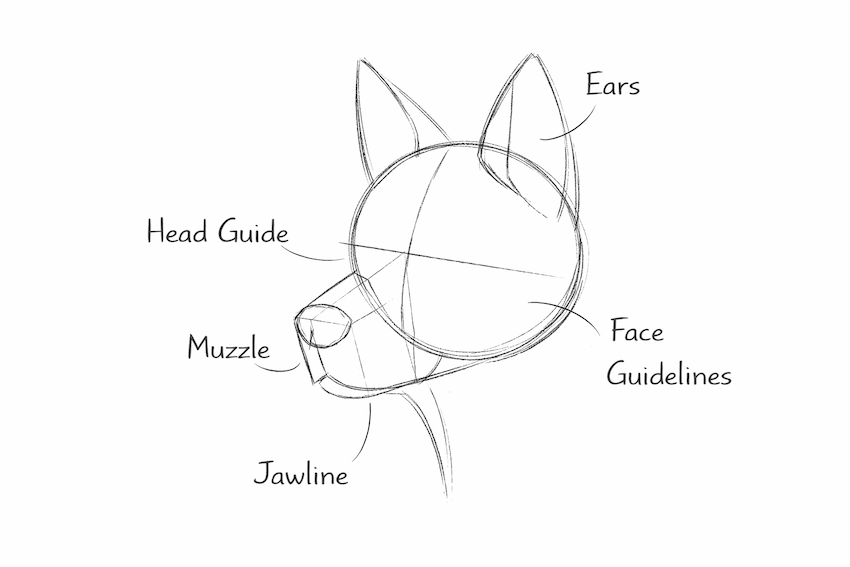
Use the head circle as a guide and sketch the muzzle extending outward. Add the jawline, ear placement, and the rough position of the eye and nose.
Step 4: Connect the Body Into a Natural Outline
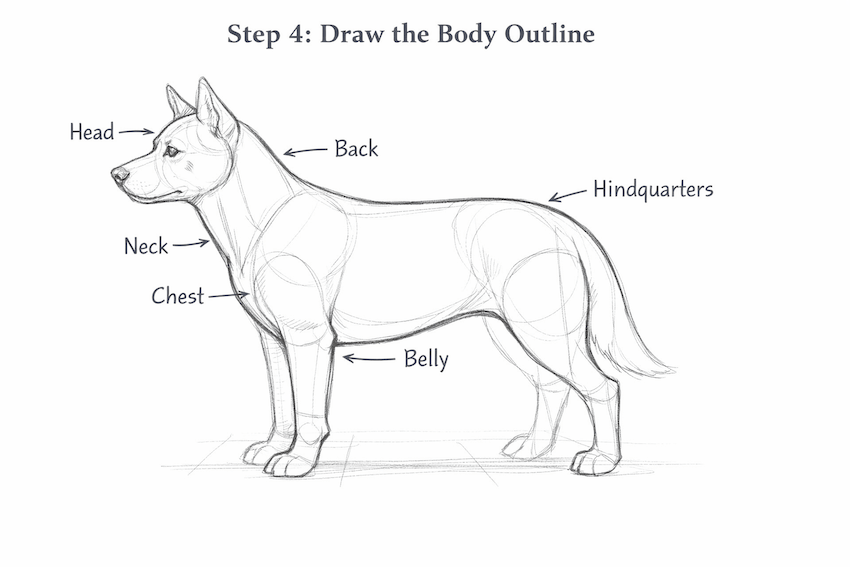
Now draw over the guides to shape the neck, chest, back, belly, and hindquarters. Focus on making the body flow smoothly rather than keeping it stiff or geometric.
Step 5: Build the Legs and Paws
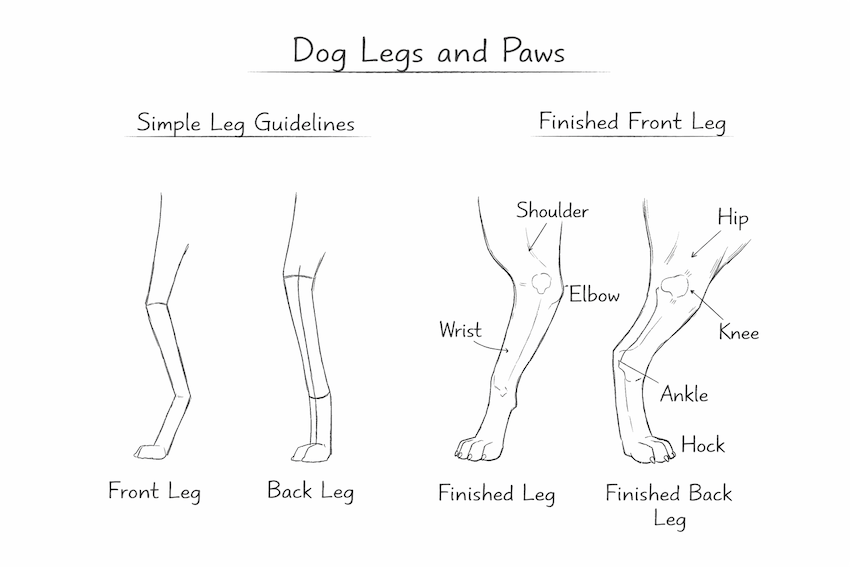
Turn the leg guide lines into full leg shapes by adding thickness, joints, and paws. Keep the front legs straighter and make sure the back legs show natural bends at the knee and hock.
Step 6: Add the Eyes, Nose, Mouth, and Ears
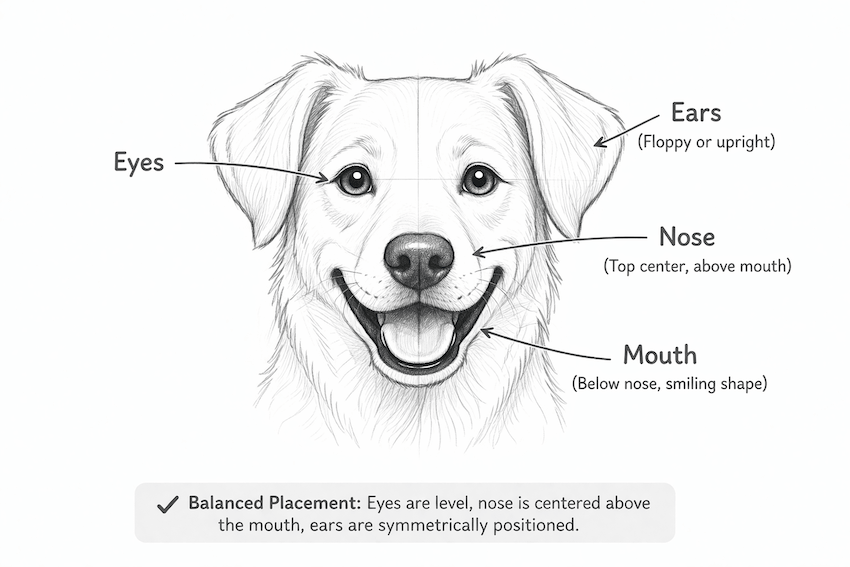
Refine the dog’s expression by placing the eyes evenly, shaping the nose, and adding the mouth line. Finish the ears according to the type of dog you want, such as floppy, pointed, or semi-erect ears.
Step 7: Erase Guides and Refine the Final Shape
Lightly erase the construction lines and strengthen the final outline. Adjust awkward curves, improve symmetry, and make sure the dog’s pose looks balanced.
Step 8: Add Fur, Texture, and Shading
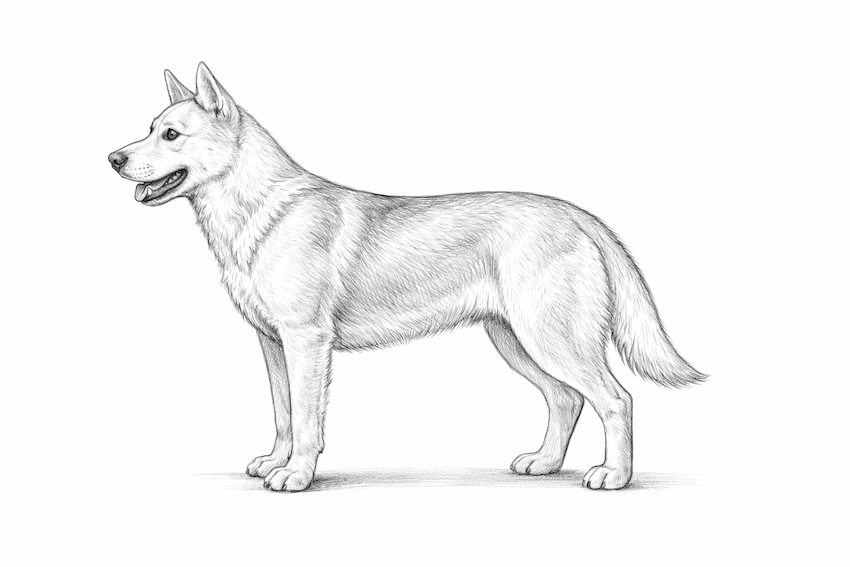
Use short strokes to suggest fur direction and light shading to create depth under the ears, chest, belly, and legs. Keep the shading soft so the drawing stays readable and dimensional.
How to Draw a Dog With Better Accuracy
A good dog drawing usually comes down to three things: proportion, posture, and simplification. If the head is too large, the legs are too short, or the back line is too stiff, the drawing can feel off even when the details are well done.
Using reference photos helps a lot, especially when learning different poses. It also helps to compare your sketch to real dogs and notice how breeds vary in ear shape, chest depth, muzzle length, and coat texture.
Additional Tips for How to Draw a Dog
| Tip | Why It Helps | How to Apply It |
|---|---|---|
| Use light lines | Soft sketching makes corrections easier. | Press lightly until the final outline is ready. |
| Start with shapes | Simple forms improve structure and proportion. | Use circles, ovals, and guide lines first. |
| Watch leg length | Uneven legs quickly make poses look wrong. | Compare each leg before darkening the outline. |
| Check the silhouette | A clear outline makes the dog recognizable fast. | Step back and inspect the overall shape. |
| Use a reference | Real dogs show true anatomy and posture. | Keep a photo nearby while sketching. |
| Draw fur last | Early texture can hide proportion mistakes. | Finish the body shape before adding fur. |
Common Mistakes When Learning How to Draw a Dog
| Mistake | Why It’s a Problem | How to Avoid It |
|---|---|---|
| Drawing details first | Early details distract from body construction. | Build the full dog before refining features. |
| Skipping guidelines | Without guides, proportions drift too quickly. | Map the body with basic shapes first. |
| Stiff body pose | Rigid lines make the dog look unnatural. | Curve the spine and vary leg angles. |
| Oversized head | The dog can look cartoonish by accident. | Compare head size to chest and hips. |
| Flat shading | Missing shadows reduce depth and form. | Add light shading under overlapping areas. |
| Ignoring breed traits | All dogs start to look the same. | Adjust ears, muzzle, chest, and coat type. |
Review and Improve Your Drawing
After you finish drawing, compare your sketch to your reference and note what looks strong and what still feels off. This review step helps you improve faster than simply starting a new drawing without checking your mistakes.
To maintain your results, practice the same dog in different poses, then try different breeds with short, long, slim, or heavy body types. Signs of success include better proportions, smoother poses, cleaner facial placement, and less reliance on erasing. If your drawings keep looking stiff or unbalanced, slow down and spend more time on the construction stage before adding details. For further progress, study basic animal anatomy or get feedback from an art teacher, a drawing course, or a critique group.
Frequently Asked Questions
The Bottom Line
Drawing a dog becomes much easier when you break it down into simple shapes and build it step by step. What starts as a few circles and lines can quickly turn into a recognizable, lifelike sketch with the right approach. As you practice, you’ll begin to understand proportions, movement, and how small details affect the overall look. You may also notice how different breeds, poses, and styles require slight adjustments in structure and technique. The key is consistency—each drawing helps you improve faster than the last. Keep experimenting, use references, and don’t be afraid to make mistakes. With time, you’ll not only draw better dogs, but develop stronger drawing skills overall.